How to Use this Map
Video Walkthrough of the Web Map:
Getting Started:
Depending on how much information you have, there are a couple of ways to search for water rights:
Scenario 1: I don't know any Water Right Document Numbers or the Person who First Applied for Water Rights for My Property
You can look for Water Rights in your area by interacting with the map to zoom to your property (mouse scroll or zoom in "+" and out "-" buttons in top-left corner of map) and then clicking on the water rights you want to learn more about. Most layers appear when you zoom in to the extent of a city or neighborhood.
Zoom buttons:

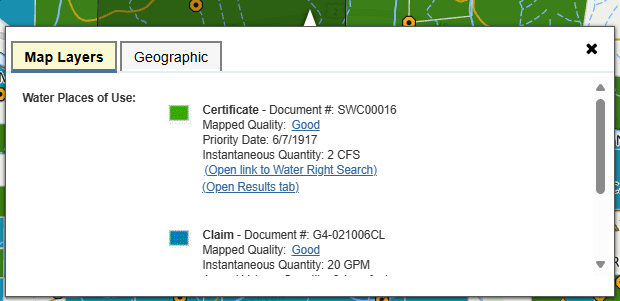
Clicking a water right will launch a popup with information on the water rights at that location as well as information on any other layers that are turned on (If a popup does not appear when clicking on the map, see the "Troubleshooting the Web Map" section of this Help page).
Popup when a layer is clicked on the map:
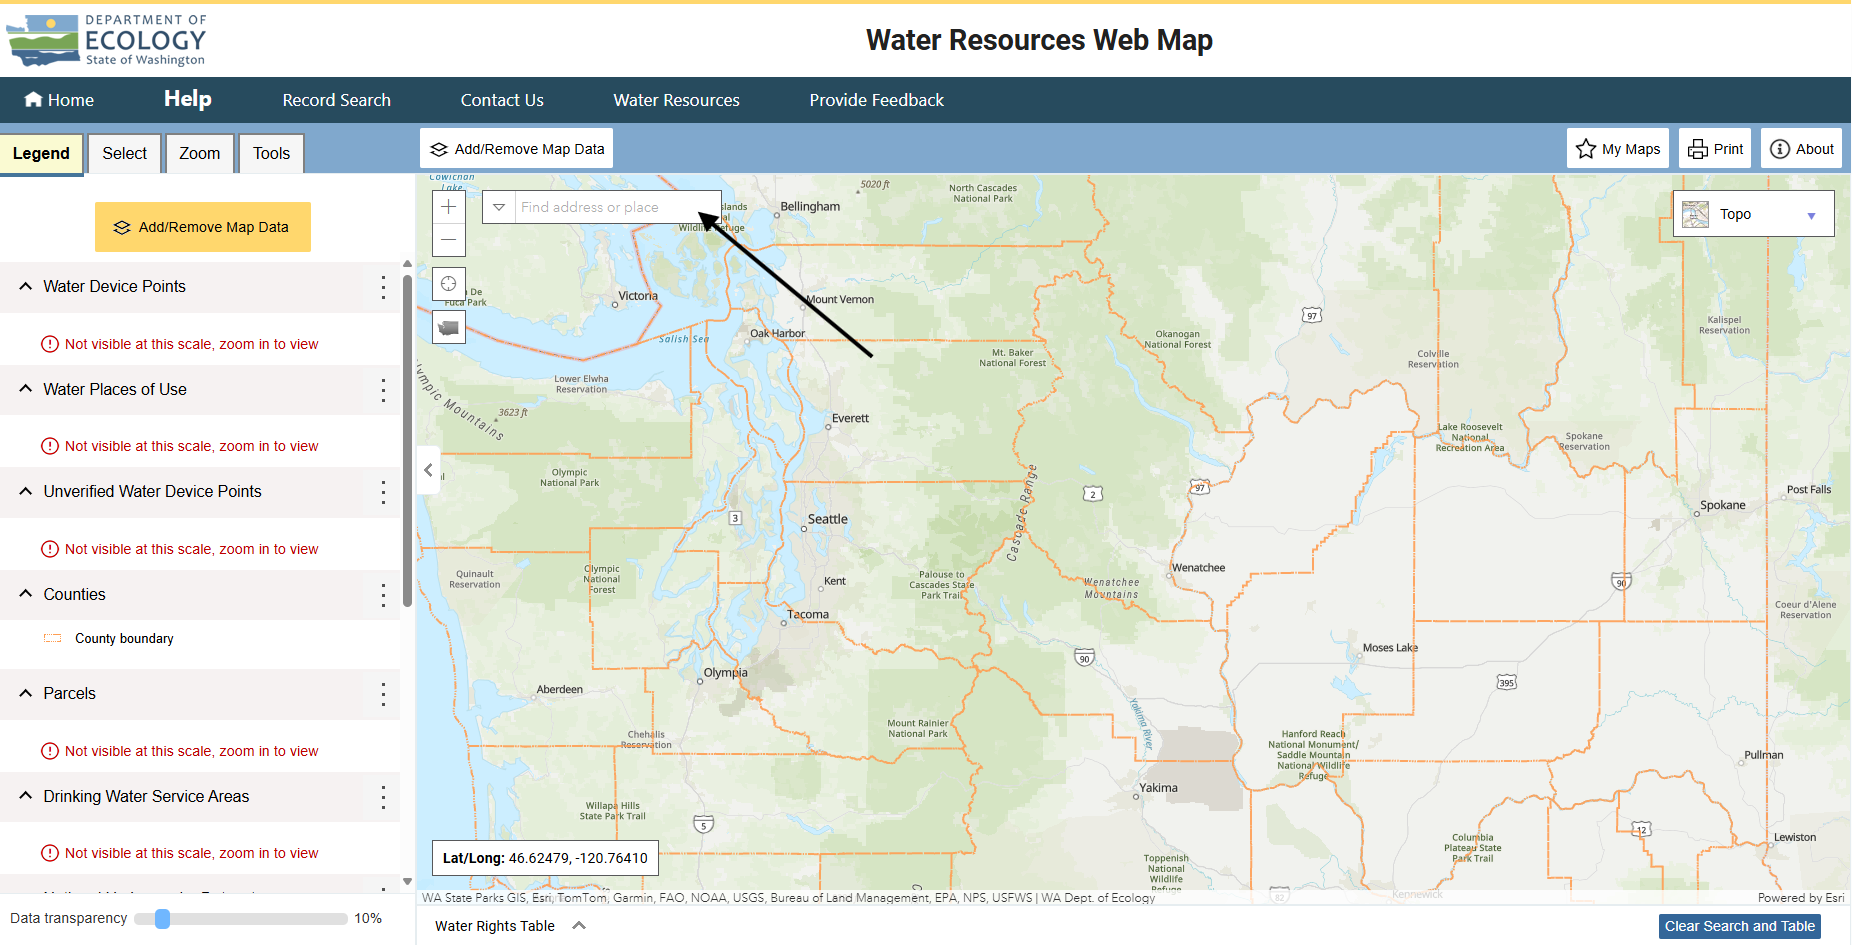
If you are having trouble finding your property or would like to zoom in directly to your property, use the Quick search bar at the top of the screen (Type an address and click on a recommendation) or use the Select By Parcel Search in the Select tab (To search by Parcel Number).
Location of Quick Search bar:
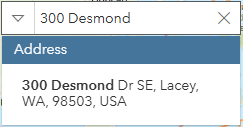
Searching for an Address with Quick Search bar with Recommendation:
Important Note: Many water rights partially overlap or fully overlap each other. To make sure you don't miss any water rights for a given property, use the Add/Remove Map Data button to select and deselect different water right place of use layers to reveal any water rights that are partially or fully hidden by other water rights.
Scenario 2: I know some Water Right Document Numbers or the Person who First Applied for Water Rights for My Property
Use the Select By Water Right Search in the Select tab or use the Quick search bar at the top of the screen. An example search for the Select By Water Right option using the Document Number, Document Id, and Person or Organization name is provided in the image below (If you do not know the full number or name, you can also search using a partial number or name).
Location of Select By Water Right Search:
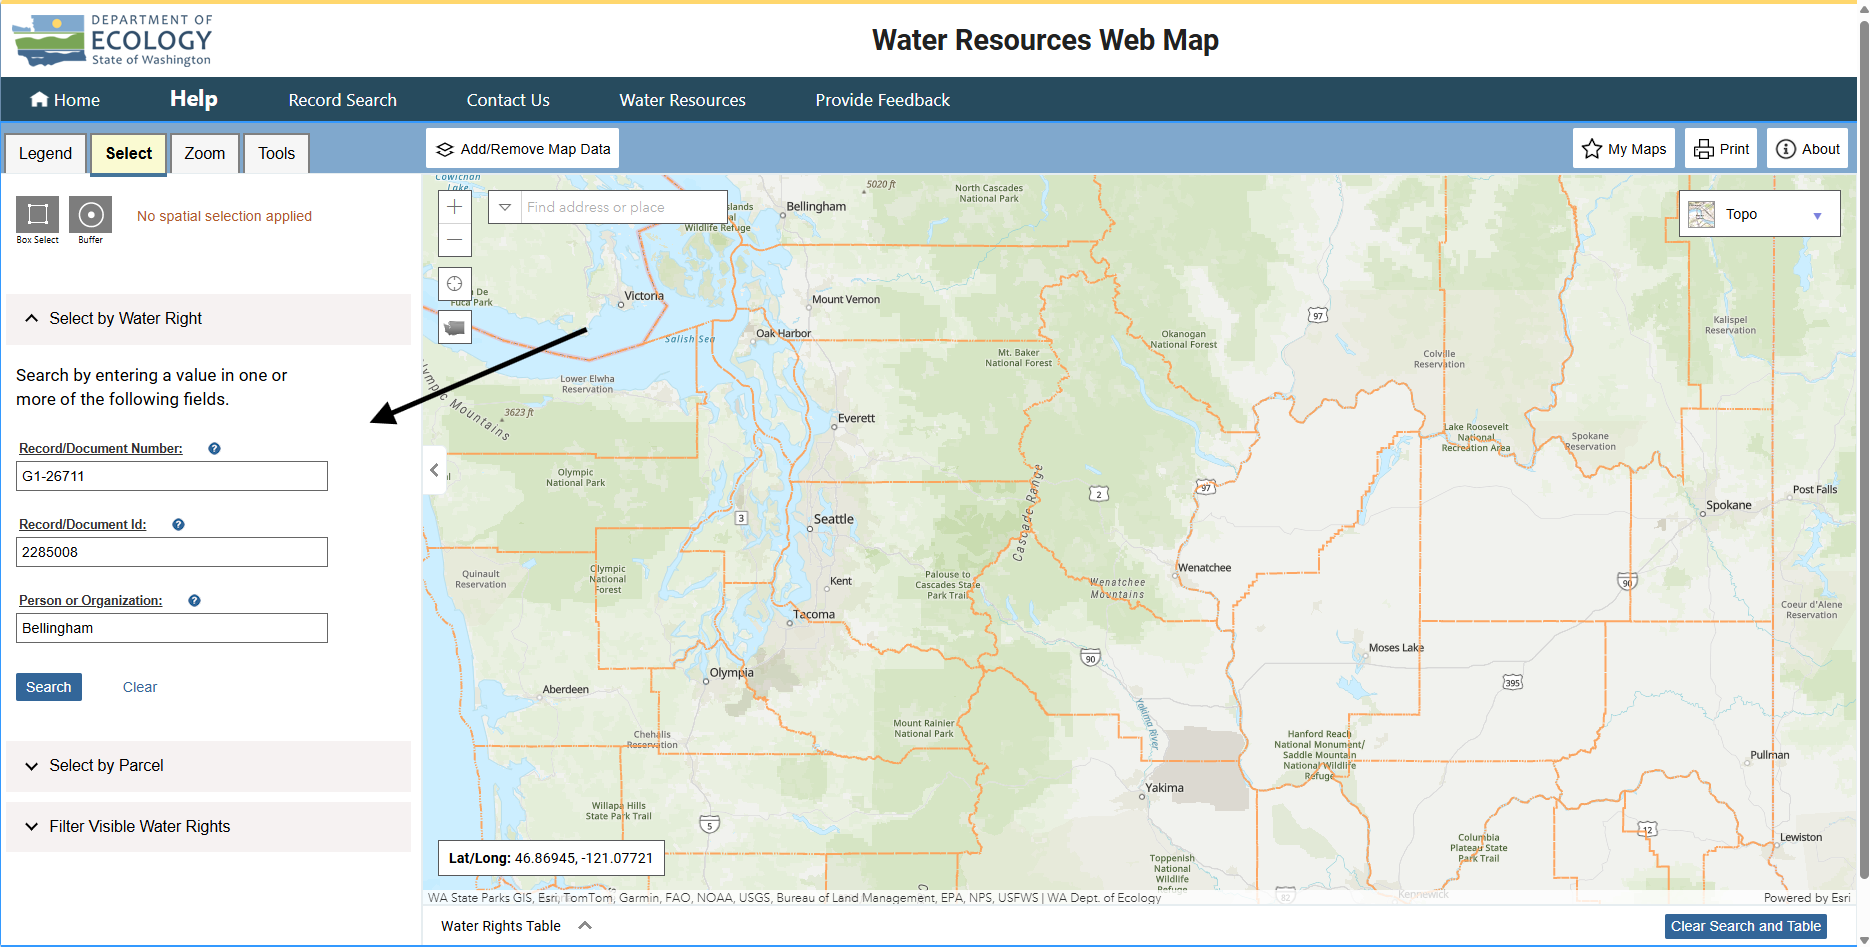
Table of Contents
Components of the Map
This interactive map is designed to help you find information about water rights in Washington state. There are several key components that make up the map:
- Legend Tab
- Add/Remove Map Data
- Select Tab and the Water Rights Table
- Zoom Tab
- Tools Tab
- Quick Search Bar
- My Maps Button
- Print Button
- About Button
- Basemap Options
Additional Information
- Web Map Update Schedule
- Troubleshooting the Web Map
- Web Map Update Schedule
- Definitions of Key Terms
Legend Tab
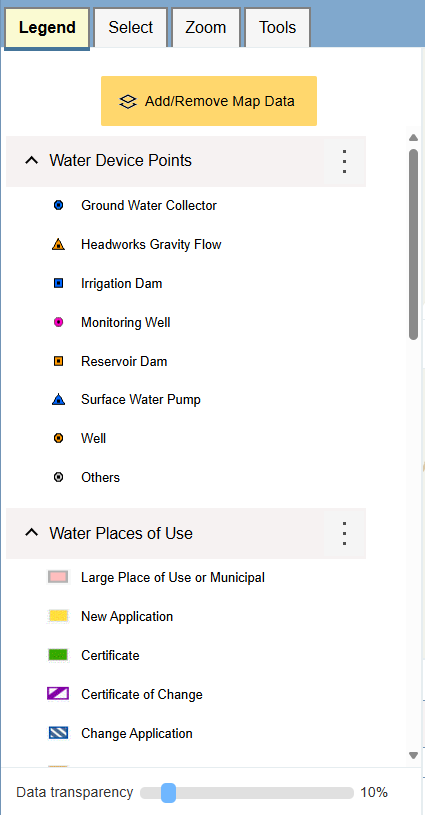
This tab is located in the upper-left corner of the screen and is closed by default. Click on the Legend tab to see a list of the layers that can currently be viewed in the map, along with icons to help you identify the layers. If you are zoomed too far out or too far in for a layer to be seen, a message appears telling you that the layer is not visible at the current extent.
You can view layer information from the Legend tab by clicking the three dot icon to the right of every layer name and then clicking on "Layer Information", which will launch a popup. You can also remove layers from the map by clicking the three dot icon and then clicking on "Remove Layer".
At the bottom of the Legend tab there is a Data Transparency bar. Use this bar to increase or decrease the transparency of all of the layers currently displayed in the map. This is a useful tool when you want to see the underlying map but don't want to turn the layers completely off.
Return to Table of Contents
Add/Remove Map Data
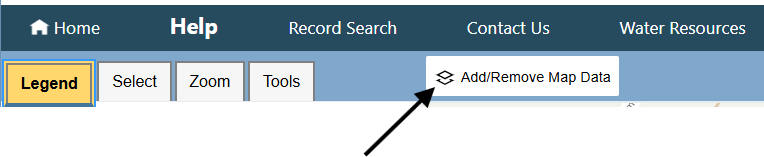
The Add/Remove Map Data button is located above the map towards the left side of the screen in the light-blue ribbon. By default, the Counties layer, the water right place of use layers, the device point and unverified device point layers, the Drinking Water Service Area layer, the Parcel layer, and the National Hydrography Dataset layer are already available in the map. If you would like to turn on more data layers or turn off some of these layers, click the "Add/Remove Map Data" button to launch a menu with available layers, which is further split up into tabs organized by the types of layers that tab contains.
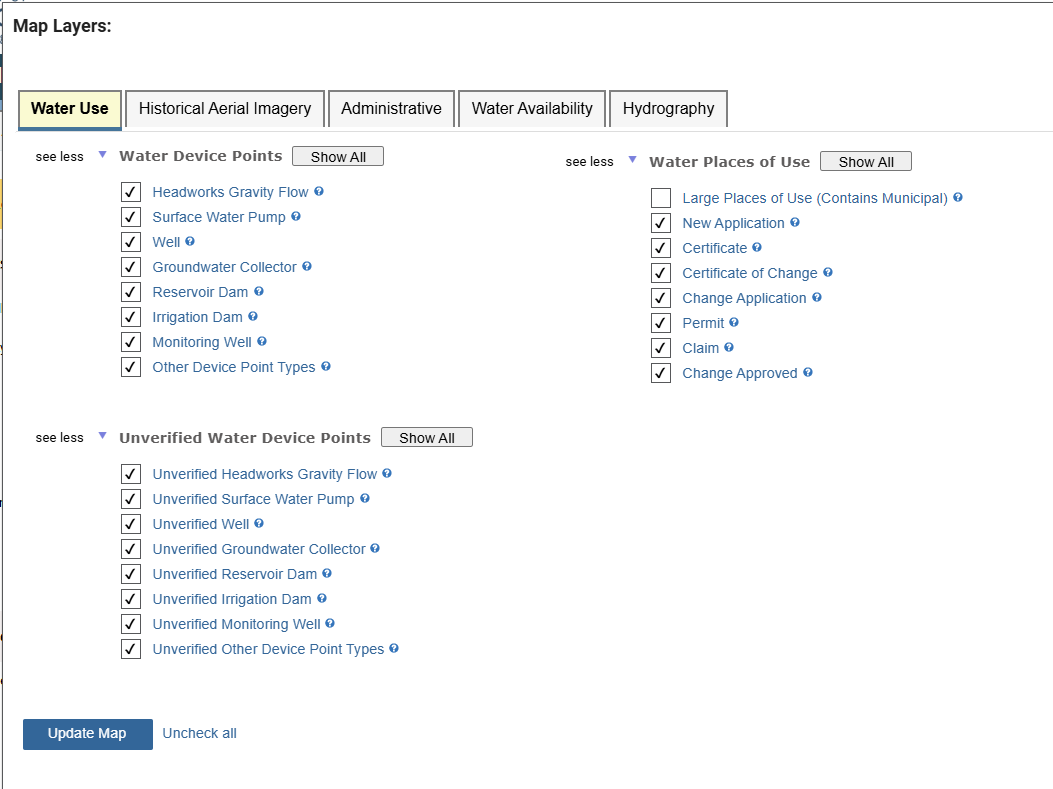
To turn a layer on or off, click the checkbox at the left side of each layer name and then click the "Update Map" button when you have checked all the layers you want to see. To find out more information about each layer, click the layer name to launch an information popup.
The available layers are grouped into categories such as "Water Device Points", "Water Right Places of Use", etc. to help you find related layers. If you would like to turn all of the layers in a category on or off, click the "Show All" toggle button next to each category (The only exception to this is the imagery layers which has a separate "Uncheck" button to uncheck the imagery options).
Return to Table of Contents
Select Tab and the Water Right Table
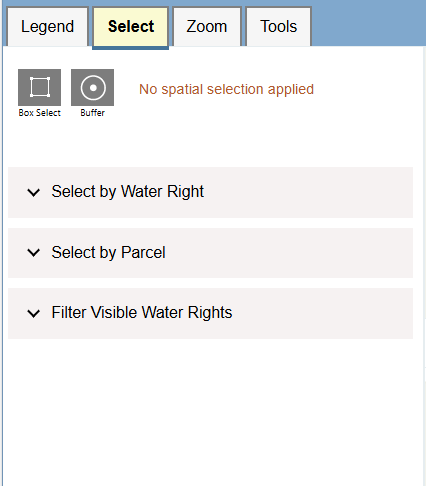
This tab is located next to the Legend Tab in the upper-left corner of the screen and is closed by default. Click on the Select tab to see five ways to Select/Search in the map: Box Select, Buffer, Select By Water Right, Select By Parcel, and Filter Visible Water Rights.

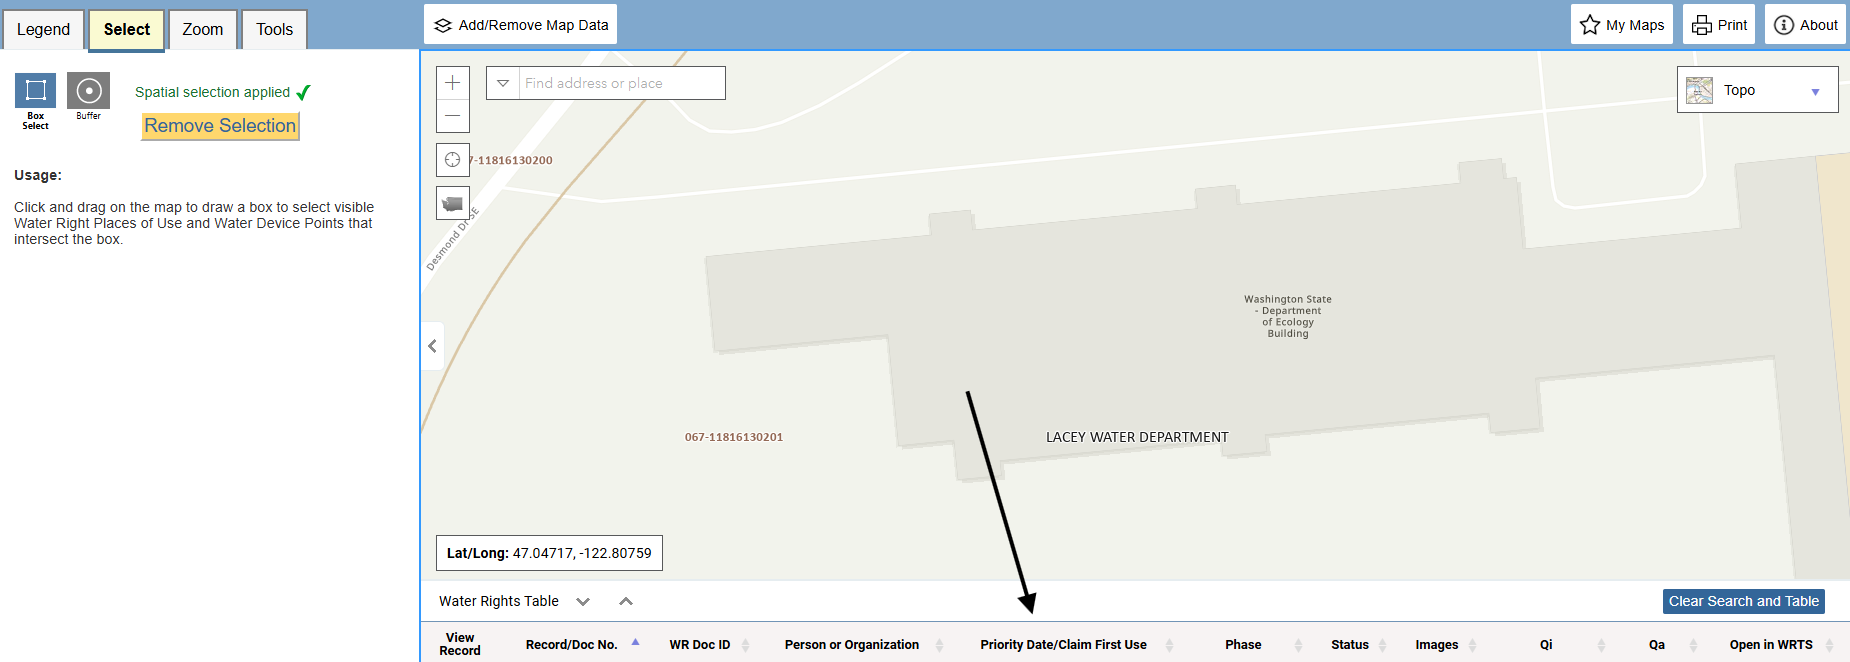
The Box Select and Buffer tools which are located at the top of the Select tab, are used to obtain information about water rights in the map. When used, these tools will launch the Water Right Table at the bottom of the map with water rights located within the boundary or point placed on the map when using these tools.
Water Right Table Location:
Select By Water Right
The Select By Water Right Search allows you to search for water rights by the Record/Document Number, Record/Document Id, Person or Organization that first recieved the water right (This person is often not the same person that uses or lives within the water right currently). To see the definitions for Record/Document Number, Record/Document Id, Person or Organization, click on the word to launch a new tab to the definition or please see the "Definitions" section of this Help Document.
After typing in your search, click the "Search" button to start the search. If there are any water rights that match, they will show up in the Water Right Search table at the bottom of the map. If there are no water rights found with the given search criteria, no records will be displayed in the table and the table will display "No records found". To highlight the Place of Use for a water right record, use the "View Record" binoculars button in the table to highlight and center the water right of interest, which will also launch or update the Results tab with information on the water right. If you want to see information on a water right in the Water Right Tracking System, click the "View" link contained in the "Open in WRTS" (Water Right Tracking System) column of the table.
Select by Parcel Search
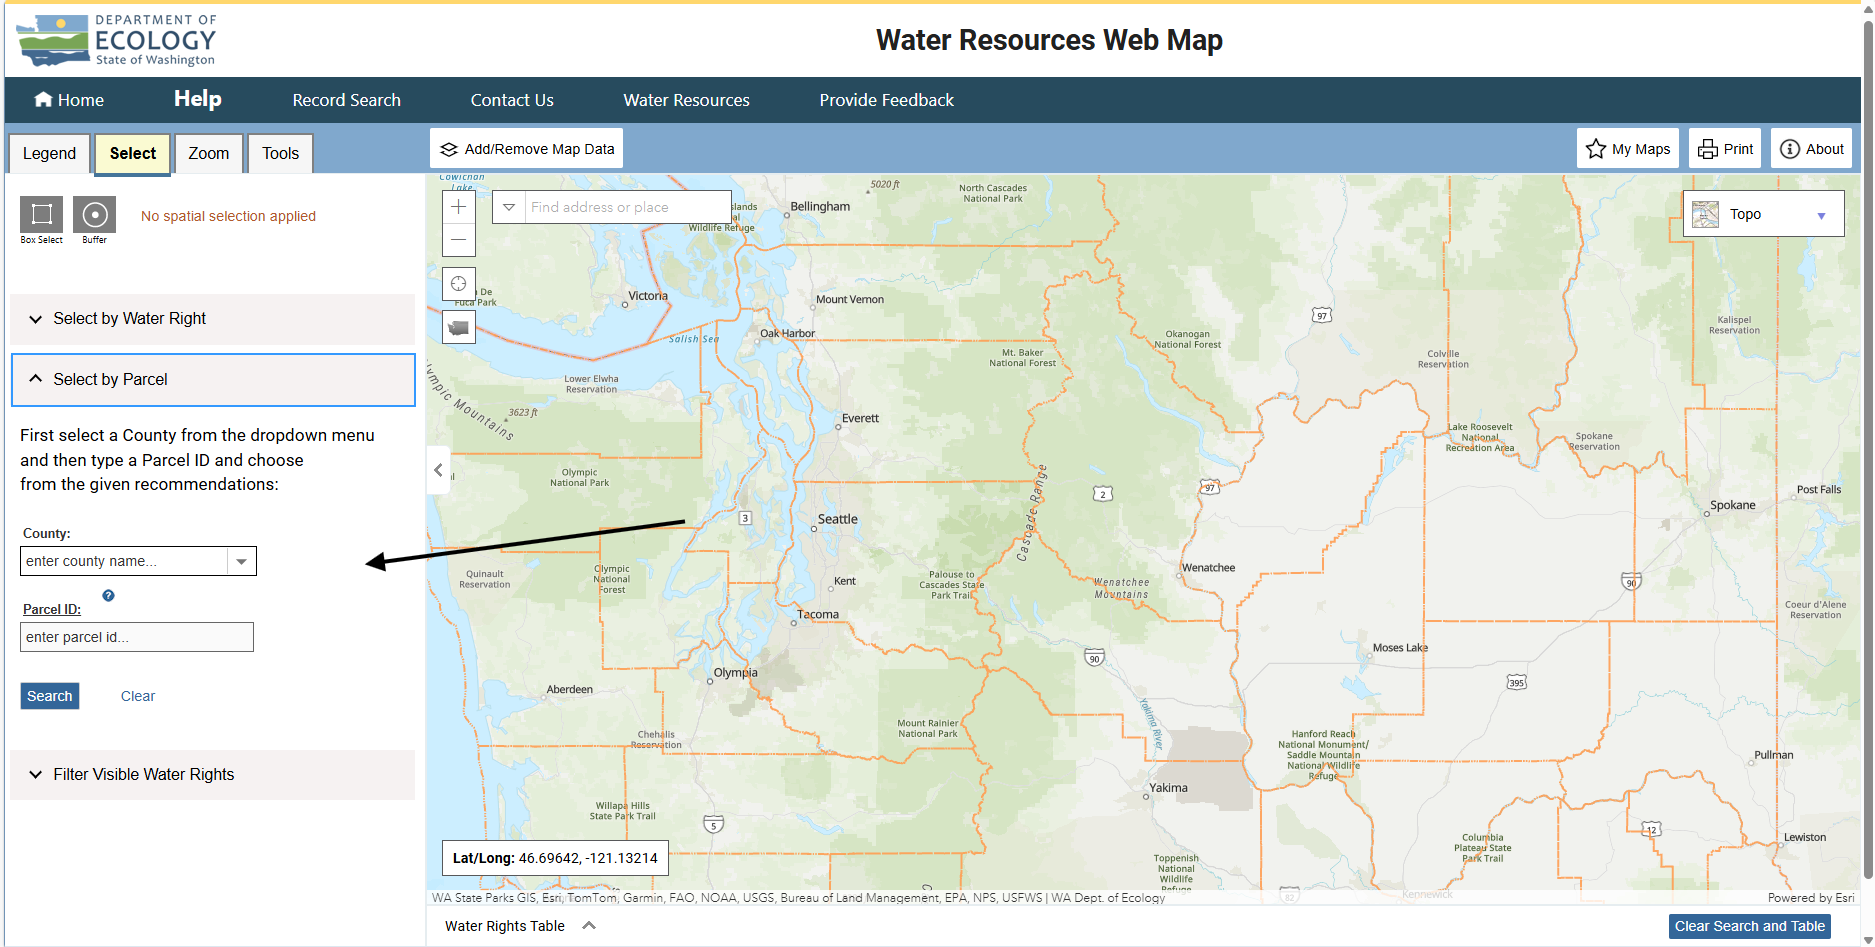
Click the dropdown for the Parcel Search in the Select tab and scroll down to see the County and Parcel input boxes if they are not already visible. Enter a County name in the County box and click on the option in the dropdown that appears and then move on to the Parcel box. Start typing a parcel number and wait for the dropdown options to appear. Click on the parcel number you want to search for and then hit "Search" which will zoom to the parcel. If there are any water rights that cover part of the parcel, they will be included in the Water Right Search table at the bottom of the screen, otherwise no water rights will appear in the water rights table and the table will display "No records found". To center and highlight a Place of Use in the water rights table, click the "View Record" binoculars button for that row, which will also launch or update the Results tab with more information about the water right. If you want to see information on a water right in the Water Right Tracking System, click the "View" link contained in the Open in Water Right Search column of the table.
Filter Visible Water Rights
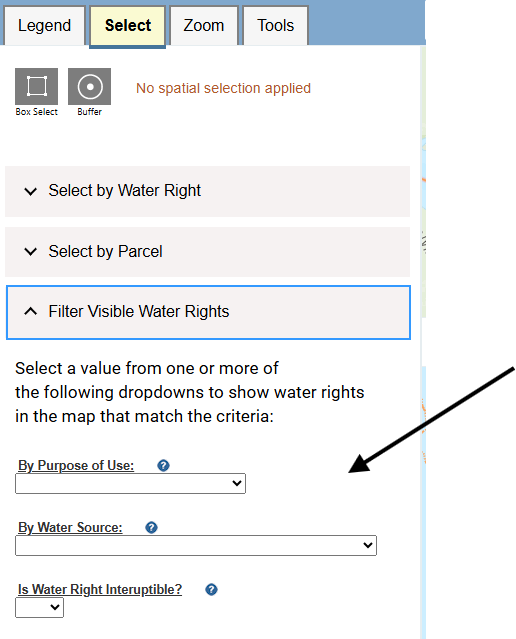
Click on one or more of the three available dropdowns and select an option from the dropdown lists to filter water right place of use layers by "Purpose of Use", "Water Source", or whether a water right place of use is "Interruptible". The map will automatically update to reflect water right place of use layers that match that criteria. To reset the filters, set each dropdown to the blank option to see all water right places of use.
Return to Table of Contents
Zoom Tab
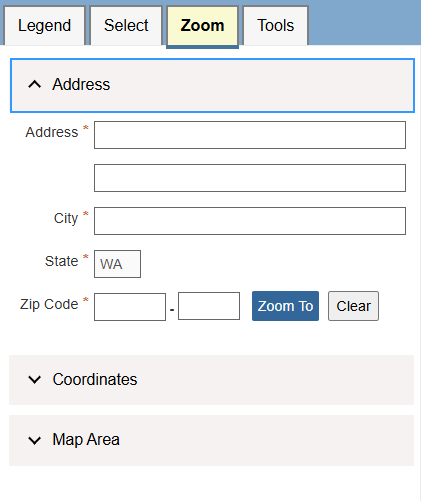
This tab is located next to the Select Tab in the upper-left corner of the screen and is closed by default. Click on the Zoom tab to explore different options for zooming in on the map.
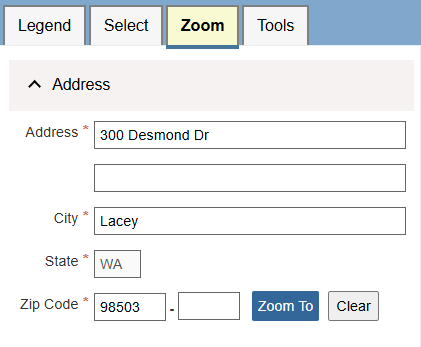
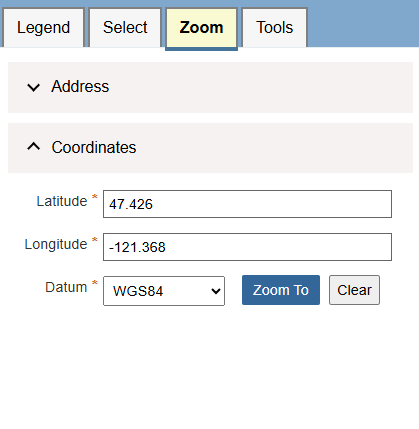
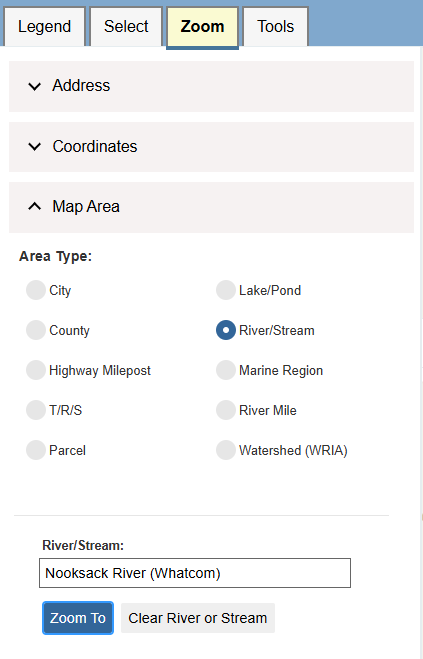
There are three sections in the Zoom tab which allow zooming to Address, Coordinates, or Map Area (Waterbody, Highway Mile, Township Range Section, etc.).
Example of Address Search:
Example of Coordinates Search:
Example of Map Area Search:
Return to Table of Contents
Tools Tab
The tools tab contains many tools which are divided into three sections: Basic, Draw, and Other.
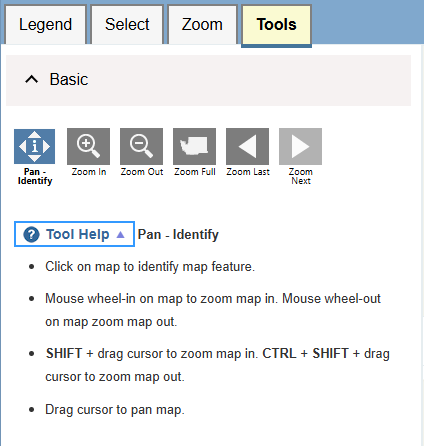
Basic Tools Section:
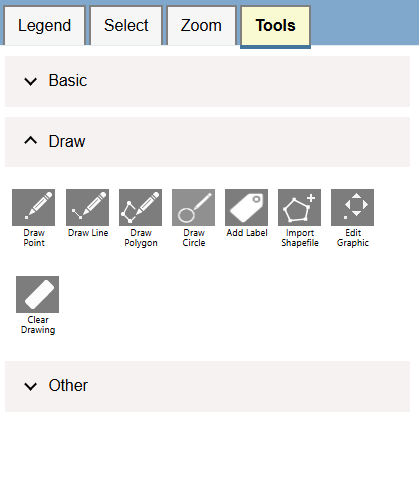
Draw Tools Section:
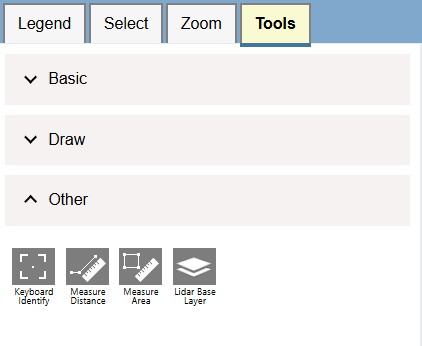
Other Tools Section:
-
Basic: Contains the tools used for basic map interaction. These tools include the Pan/Identify tool, Zoom In, Zoom Out, Zoom Full, Zoom Last, and Zoom Next.
- Pan/Identify: Is the default tool for the web map. Click on this tool after using the Zoom tools to return to normal scrolling and clicking.
- Zoom In: Click on the Zoom In button to activate it and then a "+" sign should appear where your mouse cursor was. Hold down the left mouse click and draw a square/box around the area you want to zoom to and then release the mouse click to zoom in.
- Zoom Out: Click on the Zoom Out button to activate it and then a "+" sign should appear where your mouse cursor was. Hold down the left mouse click and draw a square/box around the area you want to zoom away from and then release the mouse click to zoom out.
- Zoom Full: When you click on the button you will be zoomed out to the extent of Washington State.
- Zoom Last: If you had clicked on the Zoom In, Zoom Out, or Zoom Full tools previously, Zoom Last would bring you back to what your zoom extent was before you used the tool. If you had used multiple zoom tools previously, you could keep clicking the Zoom Last button to bring you back to previous zoom extents until there were no more zoom changes to undo.
- Zoom Next: This tool is only available to click on if you have used one of the following Zoom tools: Zoom In, Zoom Out, Zoom Full, or Zoom Last. This tool is the opposite of Zoom Last: If you were using the Zoom Last tool previously to go to previous zoom extents, Zoom Next would be what you would use to go "forward" to some of the more recent zoom changes. Once available, this tool will only stay activated as long as there is a more recent zoom change to go to.
- Draw: Contains the Draw Point, Draw Line, Draw Polygon, Add Label, Import Shapefile, Import Point CSV, Edit Graphic, and Clear Drawing tools.
- Other: Contains the Keyboard Identify, Measure Distance, Measure Area, Image Service, and Lidar Base layer tools. The Measure Distance tool Allows you to measure distances. Click on the Measure Distance tool to activate it and then click where you would like the starting point in the map. Once the first point has been selected, an option to change the units used for the measurement will appear with options of Feet or Miles. You can change the units of the measurement anytime. To end the measurement, double-click at the point where you would like the measurement to end. You can add as many points as you would like, it does not need to all be in a straight line. If you would like to redo the measurement or create a new measurement, click the "New Measurement" button. When you are done using the tool, click the Pan/Identify button in the Zoom tab or click the Measure Area button to clear the measurement. The Measure Area tool allows you to measure areas. Click on the Measure Area tool to activate it and then click where you would like the starting point in the map. Once a second point has been selected, an option to change the units used for the measurement will appear with options of Square feet, Square miles, or Acres. The default unit is Acres and you can change the units of the measurement anytime. To end the measurement, double-click at the point where you would like the measurement to end. You can add as many points to define the area as you would like. If you would like to redo the measurement or create a new measurement, click the "New Measurement" button. When you are done using the tool, click the Pan/Identify button in the Zoom tab or click the Measure Distance button to clear the measurement.
Return to Table of Contents
Quick Search Bar
The Quick search bar is located to the right of the Tools tab and is a generic search option used to highlight and zoom to a point or area of interest. Click the dropdown arrow to select which search you would like to do (There are multiple possible search options). The Search bar includes the options to search by cities, counties, water resource inventory areas, addresses, and water right types. As you type, the search bar will start to recommend options, which you can then click on to zoom to and highlight that recommendation. Once you have zoomed in to your selection of interest, you can click the map to find out what else is there via a popup. To clear the search, click the "X" at the right side of the Search bar.
Return to Table of Contents
My Maps
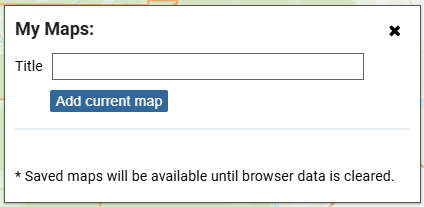
The My Maps button is located to the left of the Print button in the upper-right corner of the application in the light-blue ribbon. The My Maps button is used to create bookmarks on the map. For example, if there was a certain map extent and location that you wanted to go back to, you could click the My Maps button, give the bookmark a name, and then click "Add Current Map" to save the map extent. If you wanted to go back to the saved map extent, you could click on the My Maps button again and then click on the named bookmark. If you want to remove these bookmarks from the button, you can hit the "Delete" button next to the bookmark you want to delete and then confirm the deletion. If you clear your browser data, all saved map bookmarks will be lost.
Return to Table of Contents

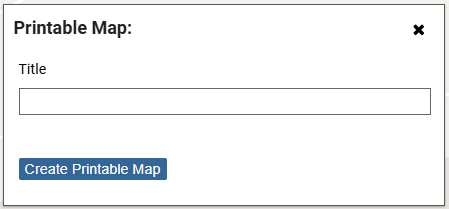
The Print button is located to the right of the My Maps button in the upper-right corner of the application in the light-blue ribbon. The Print button allows you to create a pdf of the map and any highlighted features or drawings you add to the map. To use the Print tool, first disable popup blockers for your browser, type the name of your map, and then press print (The popup blocking setting is usually in the Browser settings. You can also attempt to print without disabling the popup blocker setting, and then if a message appears that says popup blocked, click "Always allow popups" and try to print again). It takes about 30 seconds to a minute to generate the file. Once generated, a pdf of the map should appear in a new browser tab with the title specified, a scale bar, directional arrow, and a legend. You can download this pdf map from the browser to save to your computer.
Return to Table of Contents
About

The About button gives a summary of the map and contact information for the four regional offices of the Department of Ecology.
Return to Table of Contents
Basemap Options
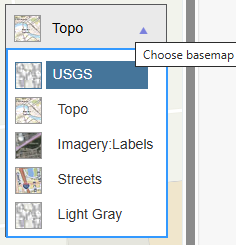
In the top-right corner of the map, there is a rectangular button labeled "Topo". If you click on this button, you will have the option to change the background map/imagery by clicking one of the following dropdown options in the list:
- Topo - A topographic basemap provided by ESRI which is the default basemap for the map. Details streets, place names, national lands, and some hydrography (streams, rivers, lakes, and other waterbodies).
- Imagery: Labels - An imagery basemap layer provided by ESRI. Details streets, place names, parks, and cities overlayed on a patchwork of imagery taken in different years.
- Streets - A Street basemap layer provided by ESRI. Similar to the Topo basemap but with different styling and more emphasis on streets.
- Light Gray - A Light Gray basemap layer provided by ESRI. Similar to the Topo basemap but everything in the map is cast in shades of gray.
Return to Table of Contents
Web Map Update Schedule
The layers in the "Water Use" tab of the Add/Remove Map Data button are updated roughly every two weeks on Fridays. During these updates the map may behave weirdly or be temporarily unavailable. If the map goes down while you are using it, please check back in after the update window or scheduled outage (Sometimes outage information will appear at the top of the map in a yellow alert banner).
Sometimes these updates may also include new features or modifications to existing features as we continue to improve the web map. You may want to consider the steps listed in the "Troubleshooting the Web Map" section below to make sure you are viewing the most recent enhancements to the map.
Return to Table of Contents
Troubleshooting the Web Map
This map is undergoing frequent change, which may cause an issue if you have visited the website before. Since browsers (Google, Firefox, Edge, and others) tend to hold onto the previous version of a website, accessing this web map after the first visit or after an update may cause issues with popups not appearing or searches not working. If this happens to you, hold down the Ctrl key while clicking the F5 key a couple of times on the keyboard (Or hold down the Command key while clicking the R key a couple of times for Mac computers). This will tell the browser to get the most recent version of the webpage, but it will also clear any browsing history or autofill data in your browser for all other websites as well. Clearing the browsing history tends to resolve most popup issues.
Return to Table of Contents
Definitions
Record Number/Document Number
The document number for the water right. Example: G1-26711
Centroid:
Centroids represent the center point of the Public Land Survey System subdivision where a water right withdrawal or diversion is located. The Public Land Survey System is a grid system covering most of the United States which is composed of townships and sections. Generally speaking, a Township is an area composed of 36 sections (6 by 6), each of them approximately one square mile in size. The accuracy of a typical centroid will depend on whether the centroid represents the center of the Section (640 acres), Quarter Section (160 acres) or Quarter-Quarter Section (40 acres) of a described water right location. For example, if a water right withdrawal location is only known to fall within Township 20N, Range 3E and Section 10, the centroid will represent the center point of a roughly square area 640 acres in size, within which also is the point of withdrawal or location. In this case, the distance between the centroid and the actual water right location may be hundreds or even several thousand feet. If the centroid represents the center of a quarter or quarter-quarter Section, the distance between the centroid and actual location will, on average, be reduced. In all cases, however, centroids should not be construed as representing the actual location.
Record Id/Document Id
The Document Id for the water right which is a number. Example: The Record Id/ Document Id for G1-26711 is 2285008
Person or Org
The person or organization that first applied for or received the water right. This may not be the same as the current person or organization currently living within the area of the water right.
Priority Date
If the water right is a certificate or claim, the Priority Date represents when Ecology received the original application. If the water right is a claim, the Priority Date is the date when the water was first used. Priority Date (to) represents any priority dates up to or equal to the date specified. Priority Date (from) represents any priority dates equal to or after the date specified.
Parcel Id
An id number or value that identified the parcel. Is either a number or a mixture of numbers and letters. If parcel id is unknown, you can zoom to a location on the map and read the parcel number label for the parcel or visit the assessor's website for the county to determine the parcel number.
Instantaneous Quantity (Qi)
Instantaneous quantity of water, expressed in gallons per minute (gpm) for groundwater or cubic feet per second (cfs) for surface water.
Annual Quantity (Qa)
Annual quantity of water, expressed in acre-feet (ac-ft).
Acres Irrigated
The number of acres claimed or authorized; an acre equals 43,560 square feet.
Purposes
The “Purposes” field designates the type of beneficial use noted on an application or claim and/or authorized by a water right permit or certificate. Some purposes include using water for "Irrigation", for a city "Municipal", for "Commerical and Industrial" purposes, etc.
Source Names
The “Source” field designates the name of a source of water as noted on an application or claim and/or authorized by a water right permit or certificate. The source information within WRTS may not always match that found on the documents. This can be due to errors within the database, attempts to group documents by source such as Columbia River pool, or for other reasons.
Interruptible Water Rights
If a stream that is used as a water source drops below its set "instream flow" value, any junior water rights using that source may be temporarily interrupted/deactivated to keep water in the stream. Instream flows are a specific flow level measured at a specific location in a given stream. Seasonal changes cause natural stream flows to vary throughout the year, so instream flows usually vary from month to month rather than one flow rate year-round.
Device Type
The type of device used for water withdrawal.
Mapped Quality
Details the location quality of the Water Place of Use drawn in the map (Based on the legal description of the location and confidence in whether the extent was drawn accurately). There are three ratings for Mapped Quality as recorded in the Geographic Water Information System (GWIS):
- Good - place-of-use mapped with good legal description and good spatial data features. Represented by a Quality Code of "G" in GWIS.
- Questionable - place-of-use mapped, but legal description is questionable (not good, but not insufficient) and/or spatial data features are questionable (not good, but not insufficient). Represented by a Quality Code of "Q" in GWIS.
- Insufficient - place-of-use not mapped due to insufficient legal description or insufficient spatial data features (the special "oval polygon" is used). Represented by a Quality Code of "I" in GWIS.
Device Point Location
Device point locations can be grouped into four different categories:
- Field Checked - The device point location has been verified in the field. In the Geographic Water Information System (GWIS), Field Checked is represented by a "C" (Checked without GPS) or "G" (Checked with GPS) code.
- Proposed - The device point location is a proposed location. Represented by location code of "P", "PA", "PD", "PM", or "PX" in the Geographic Water Information System (GWIS).
- Unchecked - The device point location has not been field checked. Represented by a location code of "U", "UA", "UD", "UM", or "UX" in the Geographic Water Information System (GWIS).
- From Well Log (unchecked) - The device point location is based on a well report narrative description and has not been field checked. Represented by a location code of "W", "WA", "WD", or "WX" in the Geographic Water Information System (GWIS).